I dusted off my DIY skills and decided to do something about that ho-hum pendant lamp in my kitchen.

It bothered me that the pendant light wasn’t centered over our table, and as long as I was uninstalling it to lengthen the chain I might as well do something fun with the color. I mused over spray-painting it bright yellow, but decided something deeper, more grounding was in order.
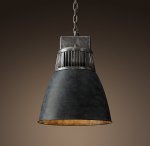
If I had all the money in the world and nothing better to do with it than decorate, I would probably get a pendent like one of these kick-ass pendants.


But since I don’t have all the money in the world, and what I do have can’t all go toward decorating, I had to get creative.
I took the inspiration of the weathered zinc look with the gilded inside. Here’s another beauty to look at.

And I decided to make something similar out of the one I already had. Let me walk you through it.
1) Uninstall your light. My kids were around to tell me I should wait until Daddy got home to help, and then I pridefully told them I was the only one in the household with electrical skills. That alone was worth the project.
2) Remove the light bulb and use painter’s tape to tape off the place where the bulb get screwed in and also along the edge where you want to have the colors meet.


3) Sand that baby. I sanded mine for about 30 seconds before I decided it probably wouldn’t make thaaaat much of a difference, and mine turned out just fine.
4) Paint the inside. I started with the gilded inner dome because I figured I would need to handle the outer part a lot more. I used Rustoleum’s Metallic Paint & Primer spray paint in Pure Gold. I chose this one because it’s more of a muted gold, but there are more glitzy metallic gold spray paints out there too if that’s what you like.
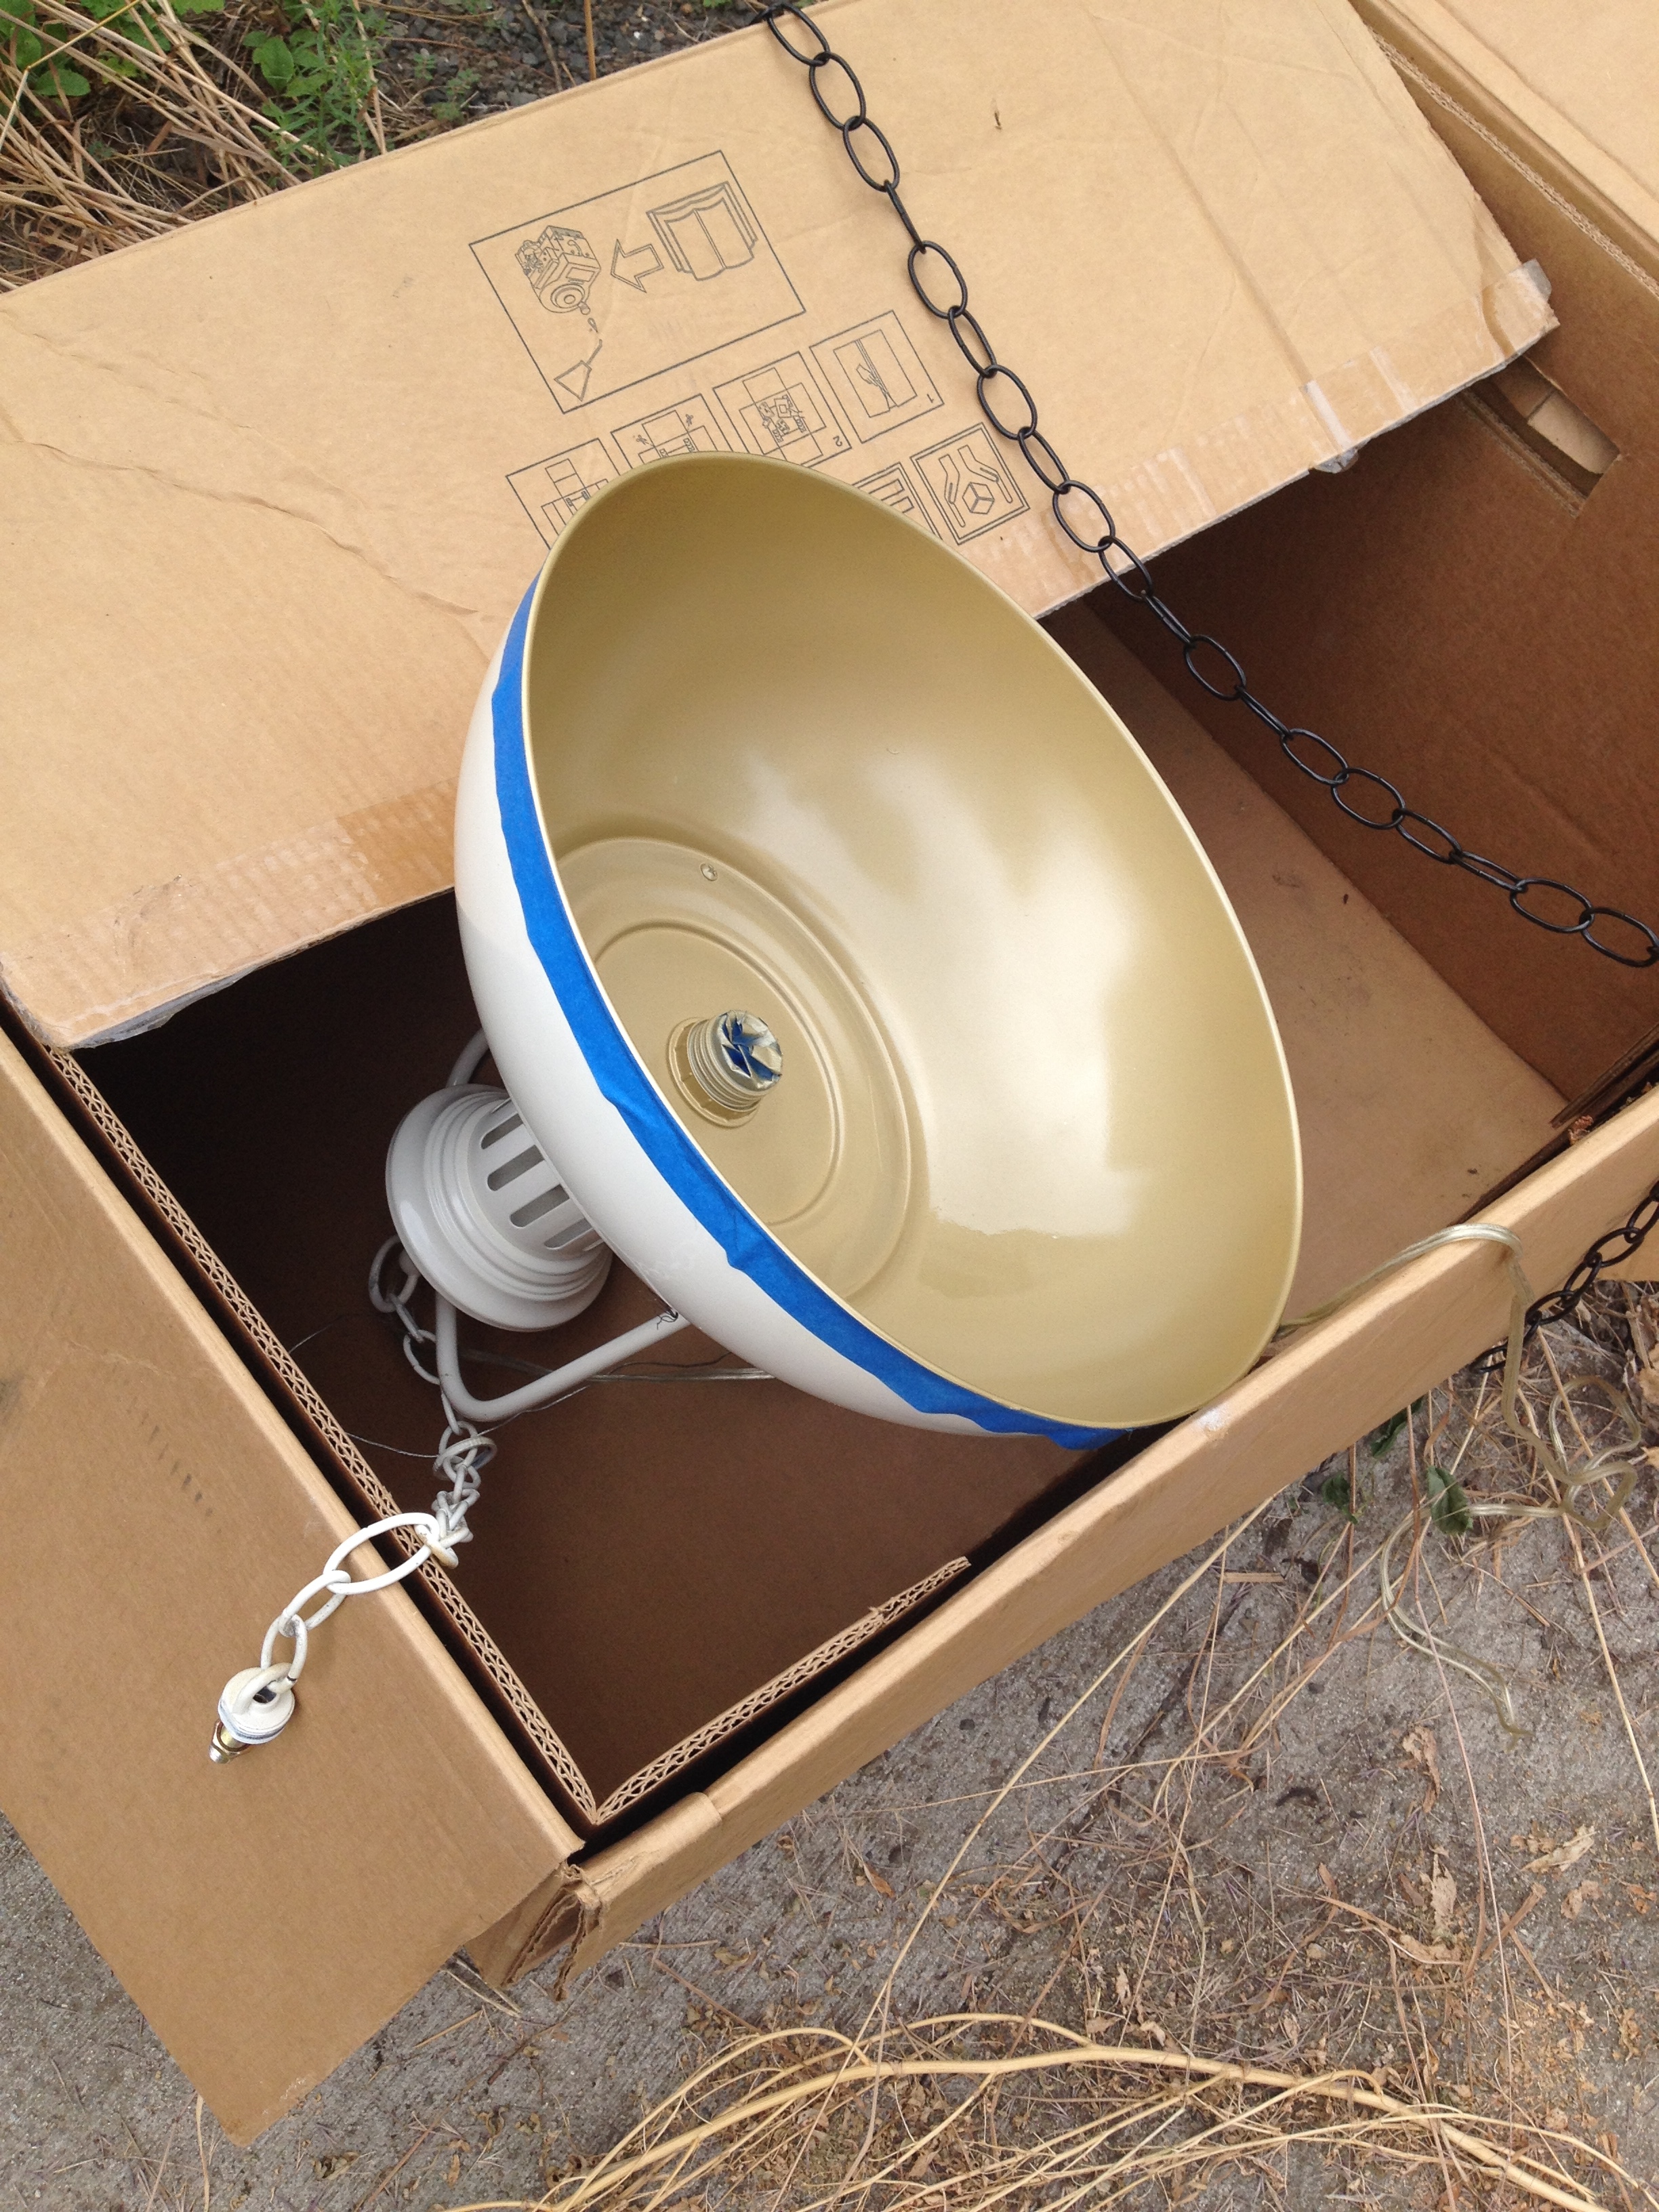

5) Paint the outside with chalkboard paint to get that zinc look (and read on for the chalk trick). I used Rustoleum’s Chalk Board Spray Paint. 


6) Paint the chain, cord, and the top (if there’s a top that you want to look slightly different than the outer dome like in the expensive examples above). I used Rustoleum Metallic Paint & Primer spray paint in Flat Soft Iron for the chain.
7) Wait about 20 minutes and then do a second coat on everything.
8) Reinstall after it dries completely. I waited about 24 hours.
9) Here’s the chalk trick! To get that weathered zinc look, I took a wet paper towel and rubbed white chalk on it, then I rubbed the paper towel around in different sweeping horizontal-ish motions until it had the right look. Go at it a few times. There’s no way to mess this part up because it’s chalkboard paint and you can always clean it off with a wet paper towel and start over. I took a few tries before it was exactly the way I wanted it.

Now wasn’t that easy?! I’m loving my new kick-ass “weathered zinc” pendant lamp!

Mandy, Good job on the lamp! I am back in Princeton and helping find “finds” for the new house that Shane and Corrie will move into in Nov. We just found a marked down couch for the TV room at a great price and great look. Someday I’ll show you photos. We went to visit Anders at West Point and he is thriving there. I come home on Friday and will be ready to find myself after 6 weeks with family this summer – which was a blessing! Janie ________________________________
Ah, Princeton finds are fantastic! I can’t wait to see photos. I’m glad you’re there to help Corrie. Thanks for the feedback!